What Are Environment Variables in Playwright?
Environment variables are key–value pairs used to store configuration data outside your test code. In a Playwright framework, they are commonly used to manage URLs, usernames, passwords, API tokens, and environment-specific values such as QA, Staging, or Production.
Why Use Environment Variables in Playwright?
Using environment variables helps you:
- Keep sensitive data (passwords, tokens) out of code because .env is placed in .gitignore
- Run the same tests in multiple environments
- Avoid hardcoding values
- Improve security and maintainability
Common Use Cases
- Base URLs (QA / Staging / Prod)
- Login credentials
- API keys and tokens
- Feature flags
- Browser or environment selection
Using .env Files in Playwright
Step 1: Install dotenv
Open your terminal and navigate to your project folder For eg : cd C:\playwrightProject, and enter :
npm install dotenv --save-devStep 2: Create a .env file
Create a .env file and add the base url and login credentials
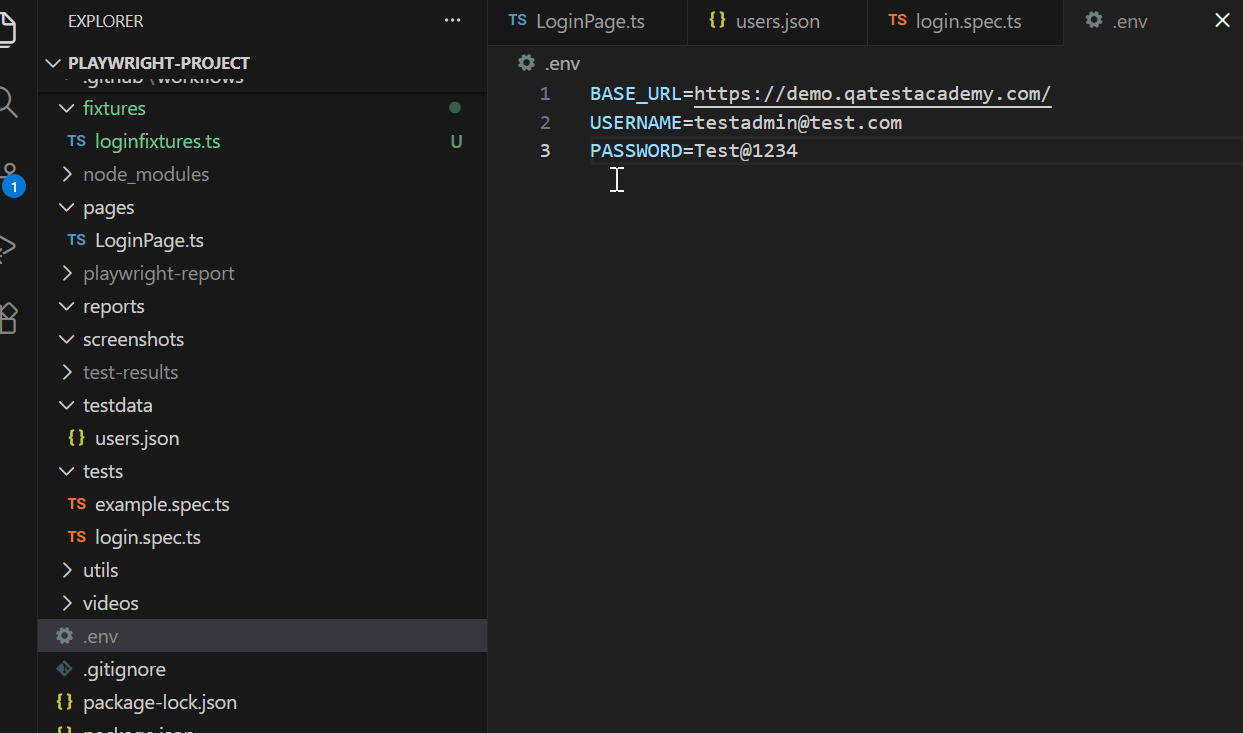
BASE_URL=https://demo.qatestacademy.com/
ADMIN_USERNAME=testadmin@test.com
ADMIN_PASSWORD=Test@1234
Step 3: Load .env in Playwright config
import { defineConfig } from '@playwright/test';
import dotenv from 'dotenv';

dotenv.config();

export default defineConfig({
  use: {
    baseURL: process.env.BASE_URL,
  },
});
After adding the above given codes in your playwright.config.ts , it will look like this

We will add the .env file inside .gitignore , this way .env file will not be pushed to the github and therefore will stay in local sytem. That’s how we make sure that the credentials are not leaked .
Open your .gitignore file in the framework and add .env , .env.*
# Playwright
node_modules/
/test-results/
/playwright-report/
/blob-report/
/playwright/.cache/
/playwright/.auth/
.env
.env.*
Fixtures
Now that we have added environment variables to our framework we will use it to add login credentials in our Fixture file.
A fixture is a reusable setup that prepares everything a test needs before it runs and cleans up after the test finishes.It helps keep tests simple by avoiding repeated setup code and making tests more reliable.For eg : if multiple test scenarios require user to login, then we don’t have to write login scenarios again and again. Instead we can create a fixture and reuse it.
Create Fixture in Framework
Create a file called loginFixtures.ts inside fixtures folder and add the following code. We will go through each line of code one by one.
import { test as base, Page } from '@playwright/test';
import { LoginPage } from '../pages/LoginPage';

type MyFixtures = {
    loggedinpage : Page;
};

export const test = base.extend<MyFixtures>({
    loggedinpage: async({page},use)=>{

        await page.goto('/');
        const loginpage = new LoginPage(page);
        await loginpage.navigateToLoginPage();
        await loginpage.login(process.env.ADMIN_USERNAME!, process.env.ADMIN_PASSWORD!);


        await use(page);
    },
});

export { expect } from '@playwright/test';
1️⃣ Import Required Modules
import { test as base, Page } from '@playwright/test';
import { LoginPage } from '../pages/LoginPage';
What this means:
test as base→ We rename Playwright’s defaulttesttobase.
This allows us to extend it later.Page→ Type definition for a browser page.LoginPage→ Our Page Object class that contains login methods.
2️⃣ Define a Custom Fixture Type
type MyFixtures = {
    loggedinpage : Page;
};
What this means:
We are telling TypeScript:
“We are going to create a new fixture called loggedinpage, and it will return a Playwright Page.”
So now our tests can use:
test('example test', async ({ loggedinpage }) => {
3️⃣ Extend the Base Test
export const test = base.extend<MyFixtures>({
What this means:
We are creating a new test object that includes our custom fixtures.
Instead of using Playwright’s default test, we use this extended one.
4️⃣ Create the loggedinpage Fixture
loggedinpage: async({page},use)=>{
What this means:
- Playwright gives us the default
page - We perform login steps
- Then we pass the logged-in page to the test using
use()
5️⃣ Navigate to Base URL
await page.goto('/');What this means:
- Opens the application URL
- URL is taken from environment variables
6️⃣ Create Login Page Object
const loginpage = new LoginPage(page);We create an object of our Page Object class.
7️⃣ Navigate to Login Page
loginpage.navigateToLoginPage();This calls a method inside LoginPage class to navigate to login page.
8️⃣ Perform Login
await loginpage.login(process.env.ADMIN_USERNAME!, process.env.ADMIN_PASSWORD!);This calls a login method from Page Object and logs in using environment credentials.
9️⃣ Pass Logged-In Page to Test
await use(page);
This is VERY IMPORTANT.
It tells Playwright:
“Now the page is logged in. Give this page to the test.”
After the test finishes, Playwright continues execution (cleanup if needed).
1️⃣1️⃣ Export Expect
export { expect } from '@playwright/test';This simply re-exports Playwright’s expect so test files can import both test and expect from this file.
How You Use This in Tests
import { test, expect } from '../fixtures/loginFixture';

test('Verify dashboard', async ({ loggedinpage }) => {
   await expect(loggedinpage).toHaveTitle('Dashboard');
});
Notice we use loggedinpage instead of page.
This is how in playwright environment variables and fixtures are used to optimize your code and make it more easy to maintain. From the next module we will show an end to end test case by using our demo site to order a product.